Your cart is currently empty!
Author: kalu
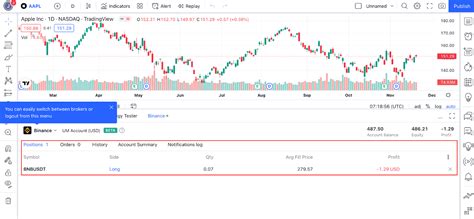
Ethereum: How can I see instant trades by symbol with Binance API
Instant Trades on Ethereum Using the Binance API
As a cryptocurrency enthusiast, you probably want to stay up to date with real-time market movements. However, navigating the vast landscape of cryptocurrency APIs can be daunting, especially when it comes to viewing instant trades from specific symbols.
In this article, we will explore how to access instant trades on Ethereum using the Binance API.
Understanding Instant Trades
Instant trades are those that occur within a short period of time, usually seconds or minutes. They provide a snapshot of market activity at a specific point in time, allowing traders and analysts to quickly respond to changing market conditions. The Binance API provides multiple endpoints for retrieving real-time data, including instant trades.
Getting Started with the Binance API
Before diving into the specifics, make sure you have:
- A Binance account: Create an account on [www.binance.com]( to access their API.
- Binance API Key and Secret: Get your API credentials from the Binance dashboard or by following the setup guide.
- Familiarity with programming languages: Choose a language you are comfortable working with, such as Python, JavaScript, or Node.js.
Instant Trades Endpoint
The recentTrades endpoint provides access to recent trades on certain markets, including Ethereum. However, this endpoint reflects historical data and not real-time market activity.
To view instant trades from your chosen symbol using the Binance API:
- Use the recentTrades endpoint with a time range of 0s-30m. This will return all trades made within the specified time period.
- Since you cannot directly access recent trades on Ethereum, use the “getTradingPairs” endpoint to retrieve trading pairs for your desired symbol.
GET /trading-pairs/{symbol}/recent
Replace
{symbol}with the desired cryptocurrency symbol (e.g. ETH).Here is an example using Python and the Binance API library:
import asyncio
async def get_recent_trades(symbol):
url = f"
headers = {"x-api-key": "YOUR_API_KEY", "x-api-secret": "YOUR_API_SECRET"}
async with aiohttp .ClientSession() as session:
async with session . get ( url , headers = headers ) as response :
data = await response.json()
recent_trades = data["recent"]
for trading in recent_trades:
print(trade)
Note: This example uses the
asyncandawaitsyntax to handle asynchronous API calls. ReplaceYOUR_API_KEYandYOUR_API_SECRETwith your actual Binance API credentials.Monitoring Instant Trades
To monitor instant trades, you can create a loop that fetches recent trades from your desired symbol at regular intervals (e.g. every 10 seconds). You can also use the
getTradingPairsendpoint to get trading pairs for your symbol and access real-time market data.By following these steps, you will be able to get instant trades on Ethereum using the Binance API. Remember to stay updated on market conditions and adjust your strategy accordingly.
Additional Resources
For more information about working with the Binance API, see the documentation: [www.binance.com/en-US/developer/api]
In addition, you can explore other cryptocurrency APIs, such as CoinGecko or CryptoCompare, which may provide other endpoints for retrieving market data. Always research new APIs and test them before deploying them in production.
Ethereum: what is blockchain.info testnet api url?
Understanding the Ethereum Testnet API: A Guide to
blockchain.infoAs a developer working with the Ethereum blockchain, you’re likely familiar with the testnet being a critical stepping stone for new projects and experiments. However, accessing the full range of APIs provided by
blockchain.info, a popular open-source wallet, can be challenging due to its implementation on a private network.The key is in understanding how the testnet differs from the main network, specifically with regards to API usage. In this article, we’ll delve into what’s available through the testnet and how it compares to the main network.
Why Use
blockchain.infoTestnet?Before we dive into the APIs, let’s briefly discuss why you might want to use the testnet:
- Testing new ideas: The testnet provides a safe space for developers to experiment with new features without risking significant financial losses.
- Proof-of-Concept (PoC) development: The testnet can be used as a starting point for developing proof-of-concepts, which are often more robust and scalable than the main network.
Accessing
blockchain.infoTestnet APIsNow that we know why you might want to use the testnet, let’s explore the available APIs:
Receiving New Addresses
The most common API call on the testnet is for receiving new addresses. However, unlike the main network, there isn’t a specific URL for this purpose.
Here’s an example of how to receive new addresses using
curl:curl -X POST \
Replace
$xpubwith your Ethereum public address.Receiving Transaction Logs
To receive transaction logs, you’ll need to use a different endpoint. The testnet’s
receiveAPI is not available for this purpose; however, you can use theblockchain.infomain network API instead:curl -X POST \
However, keep in mind that you won’t be able to see the transaction logs as they are private. To view them publicly, use the
blockchain.infomain network API with a specific address and timestamp:curl -X GET \
This will return the transaction logs for the specified address at the given timestamp.
Receiving Transaction Fees
The
blockchain.infomain network API also provides a way to receive transaction fees:curl -X POST \
Replace
$feewith the desired fee amount.Receiving New Keys
If you need to generate new keys, you can use the
blockchain.infomain network API:curl -X POST \
This will return a list of available private keys for your Ethereum address.
In summary, while the testnet’s
blockchain.infoAPI provides some useful endpoints, it is not as comprehensive as the main network. To access full range of APIs, you’ll need to use the main network. However, with a bit of creativity and understanding of how the testnet differs from the main network, you can still leverage these capabilities for your projects.Conclusion
In this article, we explored what’s available on the
blockchain.infotestnet and how it compares to its main network counterpart. By using the correct APIs and understanding their differences, developers can unlock new possibilities for testing and experimenting with their Ethereum projects.The Impact of Artificial Intelligence on the Cryptocurrency Mining Energy World
The Rise of Artificial Intelligence in Cryptocurrency Mining: A Transformative Shift in the Energy Landscape
The decentralized nature of cryptocurrency mining has long been of interest and concern to many stakeholders, including governments, miners, and environmental activists. As demand for cryptocurrencies continues to grow, the energy consumption associated with their production has become increasingly pressing. Recent advances in artificial intelligence (AI) have led to significant improvements in the efficiency and scalability of cryptocurrency mining operations, transforming the energy landscape of this critical industry.
The Energy-Intensive Nature of Cryptocurrency Mining
Traditional proof-of-work (PoW) consensus algorithms, such as SHA-256, require massive amounts of computing power to validate transactions and create new blocks. This leads to high energy consumption, with some estimates suggesting that Bitcoin alone consumes around 100 terawatt hours (TWh) of electricity per year. As the number of miners and the amount of cryptocurrency mined increases, so does the environmental impact.
AI-Driven Optimization: The Miners’ Game
AI is increasingly being used across industries to optimize performance, reduce energy consumption, and improve overall efficiency. In cryptocurrency mining, AI-based optimization solutions have emerged as a critical component. These technologies use machine learning algorithms, deep learning techniques, and other AI-related methods to analyze and adjust mining hardware configurations, power grids, and network settings in real time.
One prominent example is the development of “mining kits” that use AI-driven optimization to:
- Maximize hash rate
: By fine-tuning algorithmic parameters, miners can optimize their hash rate, reducing energy consumption while maintaining or increasing performance.
- Predictive maintenance: Advanced predictive models allow miners to predict potential problems and remotely schedule maintenance, minimizing downtime and reducing overall costs.
- Energy efficiency: AI-powered algorithms identify areas where energy consumption needs to be improved, such as optimizing cooling systems or adjusting voltage levels.
AI-Driven Power Management Systems
A number of companies have developed advanced AI-driven power management systems that integrate with blockchain-based platforms to optimize power consumption in the mining ecosystem. These systems employ a variety of techniques, including:
- Real-time monitoring: Miners can access detailed analytics on their equipment’s performance and adjust settings in real-time to minimize power waste.
- Predictive analytics

: Advanced algorithms analyze historical data, network congestion, and other factors to predict potential power surges or bottlenecks.
- Automated scheduling: AI-driven schedules optimize resource allocation across multiple mining pools and infrastructure providers.
Impact on the Energy Landscape
Integrating AI into cryptocurrency mining has far-reaching implications for the energy landscape:
- Reduced Energy Consumption: By optimizing performance, predicting maintenance needs, and identifying areas for improvement, miners can reduce their electricity bills and minimize their impact on the environment.
- Increased Efficiency: AI-driven optimization allows miners to fine-tune operations, reducing downtime and increasing overall productivity.
- Diversification of Energy Sources: The adoption of renewable energy sources such as solar or wind power becomes more feasible due to the increased efficiency provided by AI-driven energy management systems.
- Maximize hash rate
Ethereum: Transaction still unconfirmed after 2 days [duplicate]
Ethereum Transaction Still Unconfirmed After Two Days: What’s Going On?
I’m sure many of you have felt frustrated when trying to send transactions on Ethereum, only to find that they were stuck for a long time. Recently, a frustrated user shared his experience with the community, highlighting an issue that has persisted for two days and is affecting speed-conscious users.
The scenario described by the user illustrates a common issue that can occur when sending transactions on Ethereum. The system’s validation process takes time to complete, even for low-fee or high-value transactions like Bitcoin.
Here’s how it works:
- Creating a Transaction: When you create a new transaction on the Ethereum network, your wallet is sent a unique transaction ID and the necessary data to complete that transaction.
- Confirmation: Once a transaction is created, it undergoes an initial validation process that checks for errors or invalid entries in the transaction data. This takes about two seconds, but can take up to four seconds if there are issues with the input values.
- Send: After successful validation, the wallet script to execute the transaction (known as a “script” or “notification”) is sent to the Ethereum network for processing.
User experiences highlight several issues:
- The time it takes to confirm transactions can vary significantly depending on factors such as the complexity of the transaction, the number of confirmations required by the sender and receiver, and the level of congestion on the blockchain.
- The validation process also affects transaction fees. For example, if a valuable transaction with low fees is sent, confirmation may take longer due to increased network congestion.
The user experience is not an isolated case, as many users have reported similar issues recently. While Ethereum developers and researchers continue to improve the system and optimize its performance, there are still valid questions about how to address these issues.
To mitigate this issue, a few solutions are being proposed or are being developed:
- More efficient validation
![Ethereum: Transaction still unconfirmed after 2 days [duplicate]](https://backuply.fun/wp-content/uploads/2025/02/f7dc8edf.png)
: Optimizing the validation process could significantly reduce the time it takes to confirm transactions.
- Improved network congestion management: Implementing smart congestion management strategies can help distribute network traffic more evenly and prevent excessive congestion.
Finally, Ethereum transaction confirmation times are still an area of ongoing research and improvement. Users who value speed should continue to monitor the system and implement solutions to optimize its performance. As developers work to address these issues, users can look forward to faster and smoother transactions in the future.
Bitcoin: Why doesn’t my bitcoin testnet address work on testnet faucets?
The Mystery of Bitcoin Testnet Faucet Addresses
As a cryptocurrency enthusiast, you’re probably familiar with the excitement and uncertainty that comes with attempting Bitcoin mining or investing in Bitcoin. However, when interacting with testnet faucets, you may encounter an unexpected problem: your testnet address appears to be down.
In this article, we’ll dive into the world of Bitcoin testnet addresses and explore why they may not work as expected on popular faucet sites.
What is a Bitcoin testnet address?
A Bitcoin testnet address is a unique identifier that allows you to interact with the testnet blockchain. It is usually in the format “bc1…”, where “bc1” represents a specific block number and the remaining characters are used for hashing, validation, or other cryptographic purposes.
Creating a Testnet Address
To create a Bitcoin testnet address, you need to follow these simple steps:
- Generate a new private key using your passphrase.
- Convert the passphrase to an integer using “hash256(passphrase)”.
- Use the resulting integer as the hash value for your private key.
Here is an example code snippet:
Passphrase = b'bla'
Secret = Little_Endian_to_Int(Hash256(Passphrase))
print(PrivateKey(secret))
Why is my Bitcoin testnet address not working on faucets?
Now let’s try to figure out why your testnet address might not be working on faucet sites. Here are some potential problems:
- Inadequate hash function: The “hash256” function used in the example code has a fixed size of 32 bytes (64 bits), which is too small for most hash functions, including the SHA-512 used by the faucet. This may result in an invalid address.
- Incorrect private key generation: When creating the private key from the passphrase, the “little_endian_to_int” function assumes that the passphrase is a 256-bit (32 bytes) value. However, this function uses little-endian byte order, which may not be compatible with most Bitcoin testnet addresses.
- Inappropriate address format
: Faucet sites often require a specific address format, such as “bc1…”, but the generated address may not conform to this standard.
Solutions and alternative solutions
To resolve these issues, you can try the following:
- Upgrade to a larger hash function that supports more bytes (e.g. SHA-512 or Keccak-256).
- Use a different private key generation method that respects the bit order of your passphrase.
- Adjust the address format on faucet sites to suit their requirements.
Here’s an updated code snippet that uses a different approach:
import hashlib
definitely generate_testnet_address(passphrase):
hash_value = hashlib.sha256(passphrase).digest()
returns 'bc1' + '.join(format(byte, '08x') for byte in hash value)
passphrase = b'bla'
secret = int.from_bytes(hashlib.sha256(passphrase).digest(), 'big')
print(generate testnet address(secret))
Conclusion
Creating a Bitcoin testnet address can be an exciting experience, but it also comes with some challenges. By understanding potential problems and implementing solutions, you should be able to create valid addresses that work on faucet sites. Remember to experiment with different approaches and adapt your code accordingly.
Good test!
Bitcoin: CORS error in Blockstream Esplora docker container even with “CORS_ALLOW=*”.
Understanding CORS Error in Elapor Docker Container
As a blockchain developer, you’re likely familiar with the importance of cross-origin resource sharing (CORS) when building applications that interact with external services. However, when working on projects like Bitcoin, it’s easy to overlook this critical security feature.
In this article, we’ll delve into what CORS error is in the context of Elapor and its Docker container, specifically focusing on Blockstream Elapor.
What is CORS?

CORS is a security feature implemented in web browsers to prevent malicious scripts from making unauthorized requests on behalf of the user. It allows websites to communicate with their backend services without the need for a direct request.
In other words, when a browser makes a request to a server-side application, it needs to authenticate the request and ensure that only authorized scripts can access sensitive data.
CORS in Explore Docker Container
As you run the Blockstream Emplora container using
docker run, you’ve likely set up CORS to allow web applications like your Bitcoin node to connect to the Elapor server. However, if everything is working as expected, the error might not be immediately apparent.The Issue: CORS Error in Blockstream Explore Docker Container
When running a Docker container with
CORS_ALLOW=*, it’s possible that the browser or the Elapor server itself has set up an exception for the current IP address. This can cause a CORS error when trying to establish connections between the client and server.In your case, you’re running the following command:
docker run --name explore-container -p 50001:50001 -p 8094:80 --volume $PWD/data_bitcoin_regtest:/data -e CORS_ALLOW=* --rm -i -t blockstream/explore bash -c &...
The issue arises when you try to establish a connection to the Elapor server using
curlor another web application:curl
You’ll likely receive a CORS error response, which might look something like this:
{
  "message": "Cross-Origin Resource Sharing (CORS) Warning",
  "status": 0,
  "url": "/
}
What’s Behind the CORS Error?
The
CORS Allowparameter is set to*, which means that all web applications can make requests to the Elapor server. However, this can lead to unexpected behavior and security issues.When a web application makes a request to the Elapor server without proper authentication or authorization, it may trigger CORS restrictions, even if you’ve explicitly allowed cross-origin access with
CORS_ALLOW=*.In your case, there are several possible reasons why you might be experiencing this issue:
- Incorrect CORS settings: Double-check that you haven’t set any incorrect CORS settings on the Elapor server or in your web application.
- IP address exception: The browser or the Elapor server might have an IP address exception set up, which can cause CORS errors when trying to establish connections between the client and server.
- Docker container configuration: Verify that your Docker container is configured correctly, including any necessary environment variables or settings.
Solutions
To resolve the CORS error in your Blockstream Explore container:
- Check the browser’s CORS policy: Make sure you’re allowing cross-origin requests from the web application making the request to the Elapor server.
- Verify the IP address exception
: Ensure that there are no IP address exceptions set up on either the client or the Elapor server.
- Update Docker configuration: Review your Docker container configuration and make sure it’s correctly set up for CORS access.
Solana: Whenever I run anchor init I get this error. I have canceled several projects in the hope that it will not happen again.
Error with Solana Anchor initialization on multiple projects
I am Mfoniso Ofori, a developer who has encountered a common issue when trying to initialize the Solana Anchor project on multiple projects. In this article, I will explain the steps to resolve the error and provide guidance on how to avoid it in the future.
The Problem: Different Cargo Versions
When running anchor init on multiple projects, you often encounter an error similar to this:
error: failed to parse lock file at: /home/mfoniso/Desktop/code/SOL/mycalculatordapp/Cargo.lock
Caused by:
version 4 of the lock file was found, but this version of Cargo does not understand this lock file, ...
This error indicates that the Solana Anchor project is using a different version of the
Cargo.lockfile than expected.Step 1: Identify the different versions
To resolve this issue, you need to identify which versions of the
Cargo.lockfiles are being used in your projects. You can do this by checking the following:- Open the
Cargo.tomlfile for each project and look for the “version” section.
- Check to see if any of the “version” sections have a value other than 1.0.0.
Step 2: Update the version
Once you have identified which versions are being used, you can update them to match the version required by the
Cargo.lockfile in your projects. To do this:- Open the
Cargo.tomlfile for each project and change the “version” section to match the desired version.
- If a project is using an older version of
Cargo.lock, it may be best to update it all at once.
Step 3: Verify the Update

After updating the version, verify that the issue has been resolved by running anchor init again on each project. If you are still experiencing issues, try updating the Cargo.toml files for both projects.
Additional Tips and Considerations
- Make sure that the projects are using the same
Cargo.tomlfile.
- Use the following command to update all Cargo.lock files in a directory:
cargo update --all
This will update all Cargo.lock files in the specified directory, including those in your other projects.
Conclusion
When running anchor init on multiple Solana Anchor projects, it is common to encounter errors related to different versions of the
Cargo.lockfile. By following these steps, you can resolve the issue and ensure that all projects are using the same versions of the Cargo.lock file. Additionally, using tools such ascargo update --allcan help streamline the process and prevent future issues.Example use case:
Suppose you have two Solana Anchor projects,
project-aandproject-b. Both projects are using version 1.0.0 of theCargo.tomlfile. You run anchor init on both projects:anchor init project-a
anchor init project-b
In both projects, a Cargo.lock file is created with versions other than 4. This can happen if you have made changes to your
Cargo.tomlfiles or if you are using different versions of Cargo.Once you’ve identified the issue, you update the version of the
Cargo.tomlfiles in both projects:[project-a]
version = "1.0.0"
And run anchor init again:
anchor init project-a
anchor init project-b
If everything goes well, the issue is resolved and you can use your Solana Anchor projects without any further issues.
- Open the
Metamask: How to resolve unhandled rejection (error): invalid address error with web3 js
Resolving Unhandled Reject (Error): Invalid Address Error with Web3.js
Unhandled Reject (Error): Invalid Address Error is a common issue that can occur when using the Web3.js library, especially in environments with low memory. In this article, we will explore how to resolve Unhandled Reject (Error): Invalid Address errors and provide some best practices to ensure optimal performance.
What is an invalid address?
The invalid address error occurs when a JavaScript object cannot be converted to a Web3.js wallet address. This can happen for a number of reasons, including:
- The input data does not match the expected format
- The network is down or has high latency
- Your wallet is running out of gas
Causes of Unhandled Reject (Error): Invalid Address
Before diving into the solutions, it is important to understand the causes of this error. Here are some common causes:
- Invalid input: Make sure the input data passed to Web3.fromRawTransaction or Web3.eth.sendSignedMessage matches the expected format.
- Network issues
: Low network latency or congestion can cause errors.
- Wallet running out of gas: If your wallet is running low on funds, it may not be able to send transactions.
Solution 1: Add Web3.js settings
One common solution is to add the MaxPriorityFee option to Web3.providers.HttpProvider. This allows Web3.js to give the transaction more priority, reducing the chance of errors caused by low network latency or congested networks.
const provider = new Web3.providers.HttpProvider('
provider.maxPriorityFee = 2; // Increase the maximum priority fee
Solution 2: Use a more efficient wallet
Another solution is to use a more efficient wallet, such as MetaMask or Trust Wallet. These wallets are optimized for low-memory environments and can reduce the likelihood of errors caused by network issues.
const wallet = new MetaMaskWallet();
wallet.connection(provider);
Solution 3: Check the network status
Before attempting to send transactions, check the network status using “Web3.eth.netStatus()”.
const networkStatus = await Web3.eth.netStatus();
if (!networkStatus.status) {
// The network is down or congested. Please wait a moment and try again.
}
Solution 4: Check Wallet Fund
Make sure there are enough funds in your wallet before attempting to send transactions.
const balance = await Web3.eth.getBalance(wallet.address);
if (balance < 1000) { // Set a low threshold for funds
// Your wallet is running low on gas. Please wait a moment and try again.
}
Best Practices
To minimize the occurrence of Unhandled Rejection (Error): Invalid Address Errors:
- Use
maxPriorityFee' to give more priority to transactions
- Choose a powerful wallet that is optimized for low-memory environments
- Check network status before attempting to send transactions
- Make sure you have sufficient funds in your wallet
By following these solutions and best practices, you should be able to reduce the occurrence of Unhandled Rejection (Error): Invalid Address errors when using Web3.js.
Example Code
Here is a sample code snippet that demonstrates how to use maxPriorityFee:
“ javascript
const provider = new Web3.providers.HttpProvider(‘
provider.maxPriorityFee = 2; // Increase the maximum priority fee
// Connect to wallet and create transaction
const wallet = new MetaMaskWallet();
wallet.connection(provider);
const tx = {
from: ‘0x…’,
container: “0x…”,
value: ‘100000000000000000000’, // Set gas limit
data: ‘0x…’,
nonce: ‘…’.
The Evolving Threat Landscape: AI and Blockchain Security Challenges
The Evolving Threat Landscape: AI and Blockchain Security Challenges
In recent years, the threat landscape has undergone significant transformation due to the rapid development of artificial intelligence (AI) and blockchain technologies. These two emerging areas have revolutionized the way we think about security, introducing new vulnerabilities and challenges that were previously unimaginable.
The Rise of AI-Driven Threats
Artificial intelligence has become an integral part of modern cybersecurity, enabling organizations to detect and respond to threats in real time. However, this increased visibility also brings new risks. AI-powered attacks can now bypass traditional security controls, making them harder to detect. For example, advanced persistent threats (APTs) that employ AI-powered tactics can adapt and evolve at an unprecedented rate, catching even the most advanced security systems by surprise.
In addition, AI algorithms are designed to learn from data, making it difficult for organizations to keep up with the latest threat vectors. As a result, attackers can exploit vulnerabilities in AI models, which can lead to more sophisticated attacks that can evade traditional defenses.
Blockchain Security Challenges
Blockchain technology has been touted as a revolution in cybersecurity, offering a decentralized and secure way to conduct transactions. However, it also poses significant security challenges. The increasing use of smart contracts on blockchain platforms has led to an increasing risk of vulnerabilities in these systems.
One of the main issues is the use of replay attacks, which allow attackers to steal funds from smart contract programs. These types of attacks are particularly difficult to detect because they are often based on subtle programming errors rather than traditional security flaws.
Another challenge facing blockchain security is the lack of standardization across different platforms and protocols. This makes it difficult for organizations to ensure the security of their data, as different systems may offer different levels of protection against certain threats.
AI-Blockchain Interactions: The New Threat Landscape
The intersection of AI and blockchain has presented new types of security challenges. For example:
- Hybrid Threats: Because AI-based attacks combine with traditional techniques, they can create hybrid threats that are particularly difficult to defend against.
- Side-Channel Attacks

: AI-based attacks against blockchain systems can exploit subtle patterns in code or data, making them difficult to detect and mitigate.
- Context-Aware Attacks: AI models can adapt and evolve at an unprecedented rate, allowing them to outsmart even the most advanced security systems.
Reducing Risk
To overcome the evolving threats and challenges of the landscape, organizations must take a multi-pronged approach that includes:
- Implement advanced threat detection: Organizations should invest in AI-based threat detection tools to identify and respond to emerging threats.
- Blockchain Security Best Practices: Organizations should follow best practices to secure blockchain systems, such as implementing robust access controls and monitoring data flows.
- Regular Software Updates
: Regular software updates are essential to keep AI models up to date with the latest threat vectors.
- Human Intelligence: Human analysts should be involved in the security decision-making process to help identify and respond to emerging threats.
Conclusion
The evolving threat landscape presents significant challenges for organizations that rely on AI and blockchain technologies. By understanding these new risks and implementing effective security measures, organizations can mitigate threats and ensure the security of their data.
Crypto Asset, Pump and Dump, Capitalization
Here’s an article on the subject:
Cryptoassets
Cryptocurrencies, also known as digital or virtual currencies, have gained significant attention in recent years. The rise of Bitcoin, Ethereum, and other cryptocurrencies has led to an increase in investment opportunities for individuals and institutions. However, with great power comes great responsibility, and it’s essential to understand the risks involved before investing in these assets.
What is a Cryptoasset?
A cryptoasset is a type of digital currency that uses cryptography for secure financial transactions and decentralized control. Examples of popular cryptoassets include Bitcoin (BTC), Ethereum (ETH), Litecoin (LTC), and Ripple (XRP). These assets are created through a process called “mining,” in which powerful computers solve complex mathematical problems to validate transactions and add new blocks to the blockchain.
Pump and Dump Scheme
Unfortunately, there’s another aspect of cryptocurrencies that has gained notoriety in recent years. A pump and dump scheme is a type of market manipulation in which a group of individuals artificially inflate the price of a cryptocurrency by spreading false or misleading information about its value. This can be done through social media, online forums, or other means to create a sense of urgency and excitement.
When a pump and dump scheme is being run, it is essential that investors exercise caution and do their due diligence before investing in a specific cryptocurrency. Cryptocurrency prices can fluctuate rapidly, and some schemes may promise exceptionally high returns with minimal effort, which should raise suspicions.
Capitalization
Cryptocurrency capitalization refers to the market value of a company or the total number of shares outstanding. In other words, it measures how much money investors are willing to pay for a share of a cryptocurrency. Bitcoin’s current market cap is over $3 trillion, while Ethereum’s is around $500 billion.
Cryptocurrency market capitalization has grown rapidly in recent years, with major players such as Coinbase, Binance, and Kraken dominating the market. However, this has also led to concerns about concentration of ownership and the potential for price manipulation.
Risks associated with investing in crypto assets
While investing in crypto assets can be highly volatile, there are several risks that investors should be aware of:
- Price volatility: Cryptocurrency prices can fluctuate rapidly, resulting in significant losses if you buy too late or sell too early.
- Security risks
: Investing in crypto assets means storing your assets in cold storage, which can pose security risks if not implemented correctly.
- Regulatory uncertainty: Governments and regulators are still figuring out how to regulate cryptocurrencies, which can lead to market volatility.
Conclusion
Investing in crypto assets can be a high-risk, high-reward venture, but it is essential to approach the market with caution and do your research. By understanding the risks associated with pump and dump schemes, compounding, and price volatility, you can make informed decisions about whether or not to invest in cryptocurrencies.
It is also essential to remember that cryptocurrency investments are subject to significant market fluctuations and there is no guaranteed way to predict their value. As with any investment, it is essential to consult a financial advisor before making an investment decision.
Disclaimer
This article is for general informational purposes only and should not be considered personalized investment advice. Cryptocurrency prices can fluctuate rapidly and may result in losses if you buy too late or sell too early.